
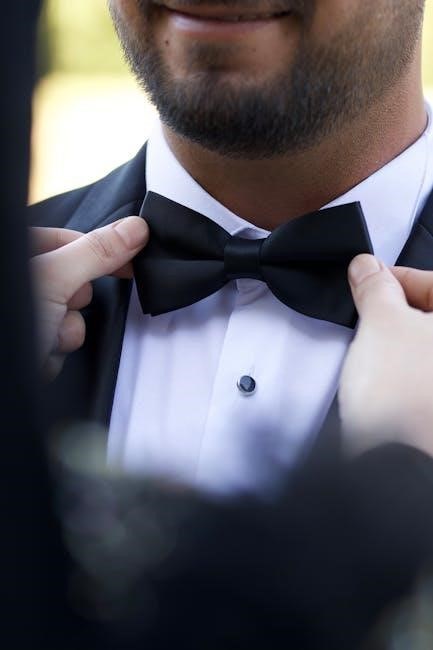
The Windsor knot, a symbol of refined elegance, is a popular choice for formal occasions and professional settings.
Numerous online tutorials demonstrate its creation,
from simple guides to mastering the double Windsor.
Learning this knot elevates your style, offering a symmetrical, substantial appearance.
Step-by-step instructions, available since 2023,
ensure even beginners can achieve a polished look with practice.
Historical Background of the Windsor Knot
The Windsor knot’s origins are deeply rooted in British aristocracy, specifically linked to the Duke of Windsor, Edward VIII, in the early 20th century.
While not definitively invented by him, the Duke popularized the knot due to his impeccable style and frequent public appearances.
Prior to the Windsor’s rise, simpler tie knots were commonplace.
The Duke favored a larger, symmetrical knot to complement his shirts’ wider spread collars, setting a new standard for formal neckwear.
This preference quickly gained traction among gentlemen seeking a sophisticated aesthetic.
Throughout the mid-20th century, the Windsor knot became synonymous with power dressing and professional attire.
Its association with formality and prestige has endured, making it a timeless choice for important occasions, as evidenced by continued tutorials today.
The Windsor Knot: A Symbol of Formality
The Windsor knot consistently represents a heightened level of formality in menswear. Its substantial size and symmetrical shape project confidence and attention to detail, making it ideal for business meetings, weddings, and other significant events.
Unlike simpler knots like the Four-in-Hand, the Windsor demands a wider spread collar to accommodate its volume, further emphasizing its sophisticated nature.
Numerous online guides, appearing as recently as 2025, highlight this crucial pairing for a balanced appearance.
Choosing a Windsor knot signals respect for tradition and a commitment to polished presentation.
Mastering this knot, through readily available tutorials, demonstrates a dedication to sartorial excellence and elevates one’s overall impression.

Types of Windsor Knots
Windsor knots vary in size and complexity, including the Full, Half, and Double Windsor.
Each style offers a unique aesthetic,
catering to different tie fabrics and collar types.
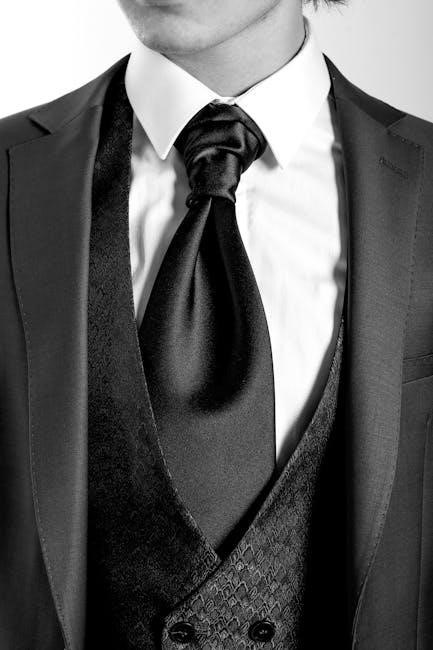
Full Windsor Knot: The Classic Choice
The Full Windsor knot, often simply called the Windsor, is renowned for its symmetrical, triangular shape and substantial size. It’s a statement knot, best suited for spread or cutaway collar shirts, providing a balanced appearance. Numerous tutorials, dating back to at least 2025, detail its creation, emphasizing the multiple wraps that contribute to its fullness.
This knot consumes a significant amount of tie length, making it ideal for shorter ties or taller individuals. Mastering the Full Windsor requires patience and practice, as it involves several precise steps. The resulting knot exudes confidence and formality, making it a staple for business professionals and special occasions. It’s a timeless choice, consistently recommended for achieving a polished and sophisticated look.
Half Windsor Knot: A More Versatile Option
The Half Windsor knot presents a refined yet less bulky alternative to its full counterpart. It maintains a symmetrical shape, though smaller and more adaptable to various tie fabrics and collar styles. Online guides, readily available since 2024, showcase its relative simplicity, making it an excellent choice for those new to tie-tying or seeking a more understated elegance.

This knot works well with medium-spread collars and standard tie lengths. It’s considered a versatile option, suitable for both professional and semi-formal settings. While requiring fewer wraps than the Full Windsor, achieving a neat and balanced Half Windsor still demands attention to detail. It’s a practical and stylish knot, offering a sophisticated look without excessive formality.
Double Windsor Knot: For Thicker Ties
The Double Windsor knot, a more substantial variation, is specifically designed for thicker tie fabrics. It creates a large, symmetrical knot that commands attention, best suited for wider spread collars to maintain visual balance. Tutorials appearing as recently as 2025 demonstrate the increased complexity, requiring more deliberate steps and fabric manipulation.
This knot consumes significant tie length, so it’s ideal for shorter ties or taller individuals. Mastering the Double Windsor delivers a powerful, confident aesthetic, often favored for high-formality events. However, its bulkiness isn’t suitable for all occasions or tie materials. It’s a statement knot, demanding a confident presentation and a well-proportioned ensemble.
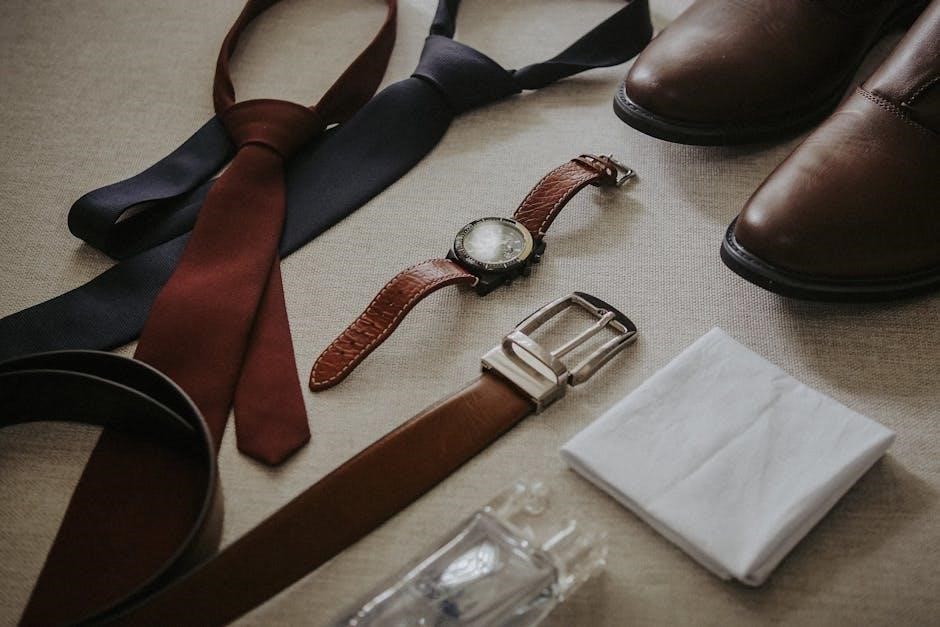
Materials Needed for Tying a Windsor Knot
Essential materials include a quality tie – silk or a blend works well – and a collared shirt with a spread or cutaway collar for optimal results.
Choosing the Right Tie Fabric
Selecting the appropriate tie fabric is crucial for achieving a successful Windsor knot. Silk ties are generally considered ideal due to their smooth texture and ability to hold a knot’s shape beautifully. However, silk can be delicate, requiring careful handling. Microfiber ties offer a more affordable and durable alternative, though they may not possess the same luxurious feel as silk.
The thickness of the fabric also plays a significant role. Thicker fabrics, like wool or heavier silks, will naturally create a larger knot, potentially better suited for wider spread collars. Conversely, thinner fabrics will result in a smaller, more understated knot. Consider the overall formality of the occasion and your personal style when making your selection. A well-chosen fabric will not only enhance the knot’s appearance but also ensure comfort throughout the day.
Appropriate Shirt Collar Styles
The Windsor knot’s substantial size demands a shirt collar that can accommodate its volume without appearing cramped. Spread collars, particularly those with a wider spread, are the most suitable choice. These collars provide ample space for the knot to sit comfortably and maintain its symmetrical shape. Cutaway collars, with their even more dramatic spread, also work exceptionally well, creating a balanced and sophisticated look.
Button-down collars are generally not recommended, as they can clash with the formality of the Windsor knot. Point collars, while acceptable in some cases, may appear disproportionate. Ultimately, the goal is to create visual harmony between the knot and the collar, ensuring a polished and refined appearance. Consider the overall aesthetic you wish to achieve when pairing your Windsor knot with a shirt collar.
Step-by-Step Instructions: Full Windsor Knot
Begin with the wide end extending significantly beyond the narrow end, initiating the process.
Follow detailed guides, available since 2025, for precise wrapping and looping techniques.
Mastering each step ensures a symmetrical, elegant result.
Step 1: Initial Positioning of the Tie
To begin the Full Windsor knot, drape the tie around your neck, ensuring the wide end extends considerably lower than the narrow end. Specifically, the wide end should hang approximately twelve inches longer – this length is crucial for achieving the knot’s substantial size and symmetrical shape.
Position the tie so the seam is facing inward, against your shirt. The narrow end should rest just above your navel, providing ample length for the subsequent steps. Many tutorials emphasize starting with the wide end on your right and the narrow end on your left, though this can be reversed based on preference.
This initial setup is foundational; incorrect positioning will make tying the knot significantly more difficult. Ensure a comfortable, yet secure, placement before proceeding to the next step, as a solid foundation is key to a successful Windsor knot.
Step 2: Crossing the Wide End Over the Narrow End
Following the initial positioning, bring the wide end of the tie across the front of the narrow end, forming an ‘X’ shape just below your chin. Maintain a gentle hold on the knot as you execute this cross, preventing it from becoming too tight or loose. This crossing is the fundamental building block of the Windsor’s symmetrical structure.
Ensure the wide end remains relatively flat as it crosses, avoiding any twisting or bunching. This will contribute to a cleaner, more refined final knot. Keep the ‘X’ relatively loose at this stage; tightening will occur later in the process.
Many guides suggest holding the ‘X’ in place with a finger to maintain its shape while you proceed to the next step, ensuring a smooth and controlled knot-tying experience.
Step 3: Bringing the Wide End Up and Through the Loop
After crossing the wide end, bring it upwards and pass it through the loop created around your neck. This motion is crucial for establishing the core structure of the Windsor knot. Ensure the wide end travels smoothly and doesn’t get caught or twisted during this upward movement.
As you guide the wide end through the loop, maintain a firm but gentle grip to control its path. This prevents the knot from becoming uneven or misshapen. The direction of travel is upwards, behind the loop formed by your collar and the tie itself.
This step begins to form the bulk of the knot, so pay attention to how the fabric layers. A clean pass through the loop is essential for a symmetrical and well-proportioned final result.
Step 4: Wrapping the Wide End Around the Narrow End
Now, take the wide end and wrap it around the front of the narrow end, moving from right to left. This wrapping action is fundamental to building the Windsor knot’s distinctive triangular shape and substantial volume. Maintain a consistent tension as you execute this wrap, ensuring the fabric lies smoothly.
The wrap should be snug but not overly tight, allowing for adjustments in later steps. This encircling movement creates a layered effect, contributing to the knot’s symmetrical appearance. Visualize the path of the wide end as it travels around the narrow end, ensuring a clean and even wrap.
This step is key to achieving the knot’s characteristic fullness and balanced proportions, setting the stage for the subsequent wrap and tightening phases.
Step 5: Repeating the Wrap for Symmetry
To maintain the Windsor knot’s signature symmetry, repeat the wrapping process. Bring the wide end across the front again, this time from left to right, encircling the narrow end once more. This mirroring action is crucial for achieving a balanced and aesthetically pleasing knot.
Ensure the tension remains consistent with the previous wrap, avoiding any looseness or excessive tightness. The goal is to create a uniform layered effect, building upon the foundation established in the prior step. Pay close attention to how the fabric folds and lies against itself.
This repeated wrap is what distinguishes the Windsor from simpler knots, contributing to its substantial size and formal appearance.
Step 6: Bringing the Wide End Across the Front
Now, carefully bring the wide end horizontally across the front of the knot, covering the previous wrap. This movement begins to form the visible portion of the Windsor knot, shaping its distinctive triangular form. Maintain a gentle but firm hold on the wide end to control its positioning;
Ensure the wide end crosses smoothly, creating a neat and even line across the front. Avoid any bunching or twisting of the fabric, as this can detract from the knot’s polished appearance. This step is vital for establishing the knot’s overall structure.
This action prepares the wide end for its final journey through the loop, completing the knot’s construction.
Step 7: Inserting the Wide End Through the Loop
Following the horizontal cross, bring the wide end upwards and carefully insert it through the loop you created around your neck. This loop sits between your collar and the knot itself. Gently guide the wide end through, avoiding any forceful pulling that could distort the knot’s shape.
As you insert the wide end, begin to hold the knot loosely with your index finger, creating space for the fabric to pass through smoothly. This prevents the knot from becoming overly tight prematurely.
This maneuver is crucial for securing the knot and preparing for the final tightening and adjustment stages.
Step 8: Tightening and Adjusting the Knot
Now, gently but firmly hold the narrow end and slide the knot upwards towards your collar. Simultaneously, use your other hand to carefully tighten the knot by sliding it up. Avoid excessive force, as this can damage the tie fabric or create an uneven appearance.
Once the knot is snug against your collar, take a moment to adjust its symmetry. Ensure both sides are balanced and the dimple (if desired) is centered. A well-formed dimple adds a touch of sophistication.
Finally, adjust the tie length so the tip reaches your belt buckle. A properly tied Windsor knot exudes confidence and style.

Step-by-Step Instructions: Half Windsor Knot
The Half Windsor, a versatile knot, is easier to tie than its full counterpart.
Guides from 2024 and 2025 demonstrate its simplicity,
making it ideal for various shirt collar styles and tie fabrics.
Step 1: Starting Position for the Half Windsor
Begin with the backside of your tie facing outwards, and position it around your neck. The wide end should extend approximately twelve inches lower than the narrow end – adjust this length based on your height and tie thickness for optimal results. Ensure the wide end is on your right side, and the narrow end remains on your left.
This initial setup is crucial for achieving the balanced symmetry characteristic of the Half Windsor knot. The narrow end should rest just above your belt buckle, providing enough length for subsequent steps without being excessively long. Maintaining this starting position ensures a clean and professional finish.
Remember to keep the tie relatively loose at this stage, allowing for comfortable manipulation during the tying process. A firm grip on both ends will aid in controlling the tie’s movement and achieving a neat knot.
Step 2: Crossing and Wrapping – Half Windsor Style
Now, cross the wide end over the narrow end, forming an ‘X’ just below your chin. Maintain a gentle hold to prevent the knot from becoming too tight prematurely. Bring the wide end up and behind the loop around your neck, emerging on the opposite side.
Next, bring the wide end down and over the front of the knot, creating a horizontal band. This wrapping action is fundamental to the Half Windsor’s structure, contributing to its balanced and symmetrical appearance. Ensure the wide end remains relatively flat during this process.
This step establishes the foundation for the knot’s shape, so precision is key. Avoid pulling too tightly, as this can make subsequent steps difficult. Keep the knot loose enough to allow for easy manipulation.
Step 3: Completing the Half Windsor Knot
Bring the wide end up and through the loop around your neck once more, this time emerging from the front. Carefully guide the wide end down through the knot you’ve created in the front – the loop formed by the horizontal band in the previous step.
Hold the narrow end and gently slide the knot up towards your collar, tightening it gradually. Avoid jerking or pulling forcefully, as this can distort the knot’s shape. Adjust the knot until it sits snugly against your collar, creating a neat and symmetrical appearance.
Finally, refine the dimple below the knot by gently pinching the tie fabric. This adds a touch of sophistication and personality.

Troubleshooting Common Issues
Addressing asymmetry, length discrepancies, or tightness requires careful adjustment. Practice and patience are key to mastering the Windsor knot and resolving common problems.
Dealing with Asymmetrical Knots
Achieving symmetry is crucial for a well-executed Windsor knot, but occasional asymmetry can occur. If your knot appears uneven, carefully retrace your steps, paying close attention to ensuring each wrap and pass is identical on both sides.
Often, a slight adjustment to the tension during the wrapping stages can correct minor imbalances. Don’t hesitate to loosen the knot partially and re-tighten, focusing on equalizing the width of each loop.
Ensure the wide end consistently crosses over the narrow end in the correct direction throughout the tying process. A reversed crossing can immediately lead to asymmetry. Finally, a quick glance in the mirror while tightening can help identify and rectify any remaining imbalances before finalizing the knot.
Adjusting for Tie Length
Tie length significantly impacts the final appearance of a Windsor knot. Taller individuals or those with longer torsos may require longer ties to achieve the ideal length – the tip should reach the belt buckle. Conversely, shorter individuals may need shorter ties.
If your tie is too long after tying a Windsor, consider starting with the wide end slightly higher than usual. Conversely, if it’s too short, begin with more of the wide end extending downwards.
Experimentation is key! Minor adjustments to the initial positioning of the wide end can make a substantial difference. Remember, a properly adjusted tie enhances your overall professional look and demonstrates attention to detail.
Fixing a Knot That’s Too Tight or Too Loose
A Windsor knot, while elegant, can sometimes be tied too tightly or loosely. If the knot feels constricting, gently loosen it by holding the narrow end and sliding the knot upwards towards the collar. Avoid pulling forcefully, as this can damage the tie fabric.
Conversely, if the knot is too loose and lacks definition, re-tie it, ensuring each wrap is snug but not overly tight. Pay attention to maintaining symmetry throughout the process. A slightly looser initial wrap can often resolve this issue.
Practice makes perfect! Don’t be afraid to untie and re-tie until you achieve the desired level of comfort and aesthetic appeal.
Advanced Techniques and Variations
Beyond the standard Windsor, explore the Kelvin knot, a streamlined variation. Experiment with creating a tie dimple for added sophistication and personal style.
The Kelvin Knot: A Windsor Variation
The Kelvin knot presents a compelling alternative to the traditional Windsor, offering a similar aesthetic with a slightly simplified tying process. Often considered a more modern take on formal neckwear, it achieves a symmetrical and substantial knot, yet requires less tie length.
Unlike the full Windsor’s multiple wraps, the Kelvin streamlines the process, making it a quicker option without sacrificing elegance. It’s particularly well-suited for thicker ties where a full Windsor might become overly bulky. Many online resources highlight its efficiency and refined appearance.
Essentially, the Kelvin is a modified Windsor, retaining the knot’s core characteristics while being more forgiving and adaptable. Mastering this variation expands your tie-tying repertoire, providing a sophisticated choice for various occasions and shirt collar styles.
Experimenting with Tie Dimple Creation
Creating a tie dimple beneath the knot elevates a Windsor from simply ‘tied’ to impeccably styled. This subtle indentation adds texture and personality, showcasing attention to detail. Achieving the perfect dimple requires a gentle touch during the final tightening stages.
Many tutorials emphasize pinching the tie just below the knot as you tighten, forming the desired depression. Experiment with the depth and width of the dimple – a deeper dimple conveys confidence, while a shallower one offers a more understated look. Practice is key to consistency.
Don’t be afraid to adjust and refine the dimple after tightening. A well-executed dimple transforms a formal knot into a statement of personal style, demonstrating mastery of a classic technique.

Resources for Further Learning
Numerous online video tutorials and illustrated guides are readily available, offering visual aids for mastering the Windsor knot.
These resources, dating back to 2023, provide step-by-step instructions, ensuring success for beginners and enthusiasts alike.
Online Video Tutorials
Numerous platforms host comprehensive video tutorials dedicated to mastering the Windsor knot. YouTube, in particular, features a wealth of content, ranging from beginner-friendly introductions to advanced techniques like the Kelvin knot variations. These visual guides, often published as recently as 2025 and 2026, break down the complex steps into easily digestible segments.
Many tutorials demonstrate both the Full and Half Windsor knots, allowing viewers to compare and contrast the styles. Some creators focus on troubleshooting common issues, such as asymmetrical knots or incorrect tie length. The availability of these resources ensures that anyone, regardless of their prior experience, can learn to tie a perfect Windsor knot with confidence. Channels like Sastreriaromanas offer detailed demonstrations, enhancing the learning experience.
Diagrams and Illustrated Guides
Alongside video tutorials, numerous websites offer diagrams and illustrated guides for tying the Windsor knot. These visual aids present the steps in a sequential, easy-to-follow manner, often utilizing arrows and clear labeling to demonstrate each movement. Many guides begin by illustrating the initial positioning of the tie – wide end on the right, small end on the left – a crucial starting point.
These resources often complement video tutorials, providing a static reference for those who prefer a more visual learning style. They detail each wrap, cross, and loop, ensuring clarity. Guides frequently emphasize achieving symmetry and adjusting for tie length. Published as recently as 2024 and 2025, these resources provide accessible instruction for mastering this classic knot.